> ## Documentation Index
> Fetch the complete documentation index at: https://developers.entri.com/llms.txt
> Use this file to discover all available pages before exploring further.
# Getting Started
> One showUnify() call to let users buy a domain or connect one they own, in 5 minutes.
Welcome to Entri! This guide walks you through your first integration: a single `showUnify()` call that lets your users connect a domain they already own or buy a new one, without you building a selection screen or managing two flows.
New to DNS? Check out [DNS Concepts](/dns-concepts) for a quick primer on record types, propagation, and common gotchas.
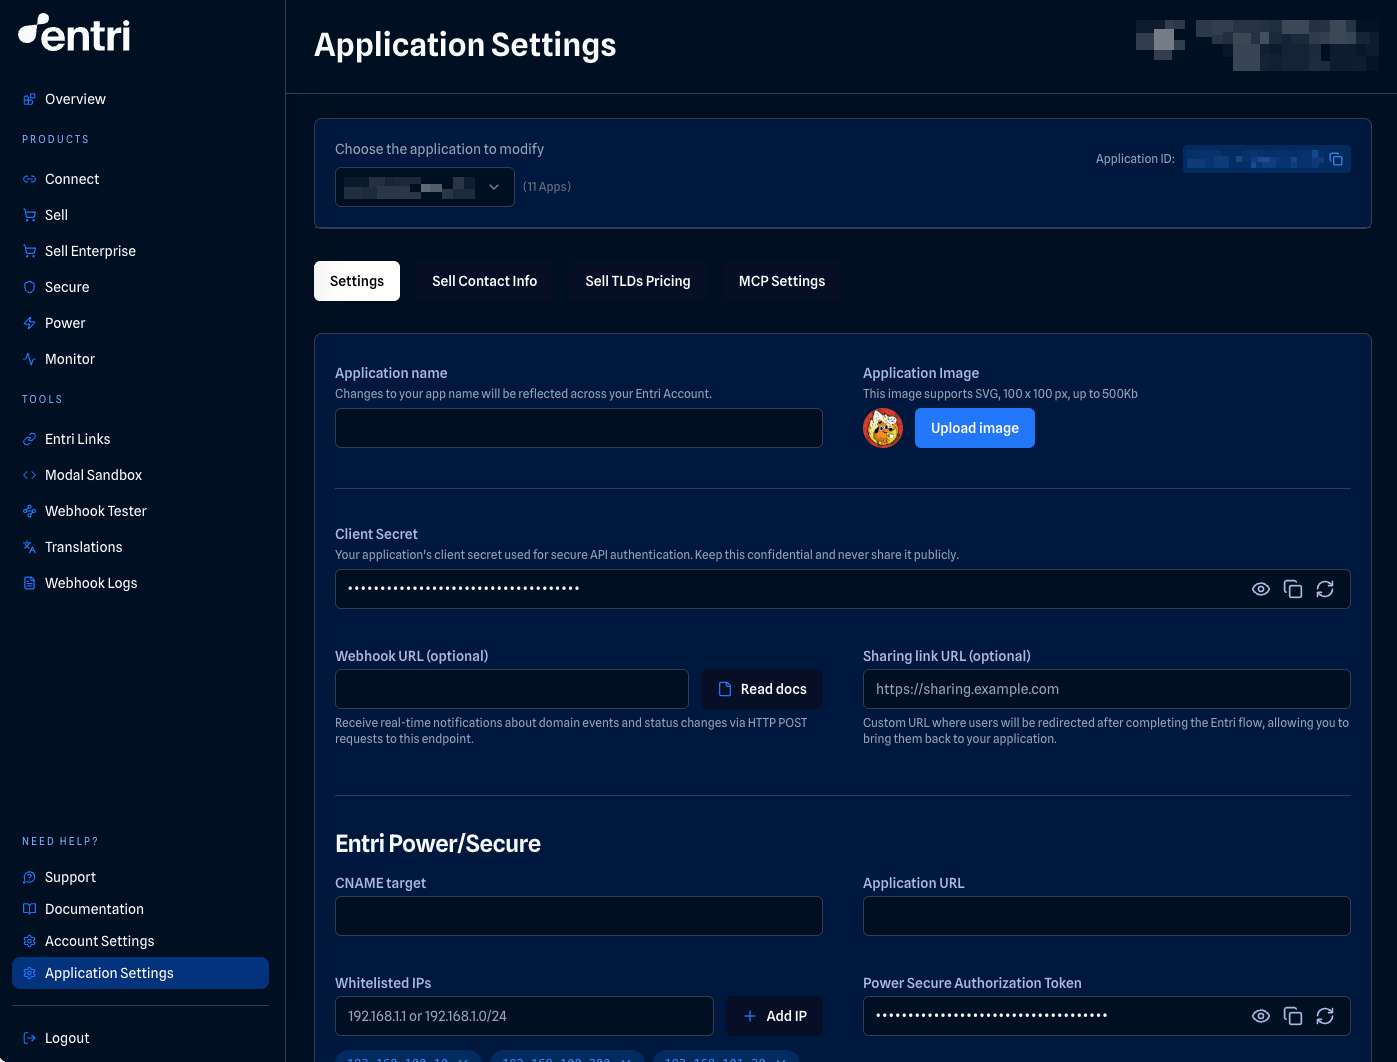
## 1. Set up your dashboard
Before writing code, configure your application in the [Entri Dashboard](https://dashboard.entri.com):
1. Sign up or log in
2. Create an application
3. Set your display name and icon (PNG or SVG, 1:1 ratio, white or transparent background)
4. Copy your `applicationId` and `secret`
## 2. Install Entri
Choose your preferred installation method:
```html HTML (CDN) theme={"system"}
```
```bash npm theme={"system"}
npm install entrijs
```
If using npm, import it in your code:
```javascript theme={"system"}
import Entri from 'entrijs';
```
**Subresource Integrity (SRI):** If your security policy requires SRI, load Entri via the pinned loader URL with its SHA-384 hash:
```html theme={"system"}
```
The loader at `entri-latest.js` is immutable, so the integrity hash above stays valid across Entri SDK releases — no need to update it on each version.
Because the loader fetches the SDK asynchronously, `window.entri` isn't available immediately. Wait for the `entri:ready` event before calling `showUnify()`:
```javascript Callback theme={"system"}
function onEntriReady(cb) {
if (window.entri) return cb(window.entri);
window.addEventListener("entri:ready", () => cb(window.entri), { once: true });
}
onEntriReady((entri) => {
entri.showUnify(/* …config… */);
});
```
```javascript Promise theme={"system"}
const entriReady = new Promise((resolve) => {
if (window.entri) return resolve(window.entri);
window.addEventListener("entri:ready", () => resolve(window.entri), { once: true });
});
entriReady.then((entri) => entri.showUnify(/* …config… */));
```
## 3. Get a JWT token
For security, fetch the JWT on your **server-side**. The token expires after 60 minutes.
Never expose your `secret` in client-side code. Always fetch the JWT from your backend.
```javascript JavaScript theme={"system"}
fetch('https://api.goentri.com/token', {
method: 'POST',
headers: {
'Content-Type': 'application/json'
},
body: JSON.stringify({
applicationId: "YOUR_APP_ID", // From the dashboard
secret: "YOUR_SECRET" // From the dashboard
}),
})
.then(response => response.json())
.then(data => {
console.log('Token:', data.auth_token);
// Save this token to use in step 4
})
.catch(error => console.error('Error:', error));
```
```python Python theme={"system"}
import requests
import json
url = "https://api.goentri.com/token"
payload = {
"applicationId": "YOUR_APP_ID", # From the dashboard
"secret": "YOUR_SECRET" # From the dashboard
}
headers = {"Content-Type": "application/json"}
response = requests.post(url, headers=headers, data=json.dumps(payload))
if response.ok:
data = response.json()
print("Token:", data["auth_token"])
# Save this token to use in step 4
else:
print("Error:", response.text)
```
## 4. Launch the Entri modal
With your token ready, launch the Entri modal. Entri asks the user whether they want to buy a new domain or connect one they already own, then routes them through the right flow. The records you pass in `dnsRecords` are applied either way; this example uses a single CNAME, and [DNS Records](/connect/dns-records) covers all supported types and their fields:
```javascript theme={"system"}
entri.showUnify({
applicationId: "YOUR_APP_ID",
token: "YOUR_JWT_TOKEN", // From step 3
dnsRecords: [
{
type: "CNAME",
host: "www",
value: "your-app.com",
ttl: 300
}
]
});
```
That's the whole integration. No selection UI to build, no branching logic, no separate purchase and connect code paths.
**DNS monitoring is included.** Every domain added through `showUnify()` is automatically enrolled in [Entri Monitor](/monitor/overview), which watches its DNS records and notifies your webhook if they change or break. No extra configuration needed.
If you only need one of the two paths, call [`connectDomain()`](/connect/sdk#entri-connectdomain-config) (connect an existing domain) or [`purchaseDomain()`](/sell/sdk) (buy a new one) directly. They take the same config, but note that they don't enroll domains in Entri Monitor by default; pass `monitor: true` if you want monitoring. `connectDomain()` was previously named `showEntri()`, which is deprecated but still works as an alias.
## 5. Handle events
Listen for completion and close events:
```javascript theme={"system"}
entri.showUnify({
applicationId: "YOUR_APP_ID",
token: "YOUR_JWT_TOKEN",
dnsRecords: [...],
// Called when DNS setup completes successfully
onSuccess: (data) => {
console.log('Domain configured:', data.domain);
// { domain: "example.com", success: true, setupType: "automatic", ... }
},
// Called when the modal is closed
onEntriClose: (data) => {
console.log('Modal closed:', data);
}
});
```
If you want to know which path the user chose, listen for the `onEntriPathSelected` browser event. After that, the selected flow fires its regular events. See [Unify events](/unify/events) for the details.
```javascript theme={"system"}
window.addEventListener('onEntriPathSelected', (event) => {
console.log('User chose:', event.detail.path); // "sell" or "connect"
});
```
## Complete example: React
Here's a full working example with React:
```jsx theme={"system"}
import { useEffect, useState } from 'react';
function DomainSetup() {
const [token, setToken] = useState(null);
useEffect(() => {
// Fetch JWT from your backend
fetch('/api/entri-token')
.then(res => res.json())
.then(data => setToken(data.token));
}, []);
const handleSetup = () => {
if (!token) return;
entri.showUnify({
applicationId: "YOUR_APP_ID",
token: token,
dnsRecords: [
{
type: "CNAME",
host: "www",
value: "your-app.com",
ttl: 300
}
],
onSuccess: (data) => {
console.log('Success:', data);
// Update your UI or backend
}
});
};
return (
);
}
export default DomainSetup;
```
For more framework-specific examples, see our [React Integration Guide](/integration/react) and [Vanilla JS Guide](/integration/vanilla-js).
## Next steps
You just integrated [Entri Unify](/unify/overview), which routes your users into Entri Connect (existing domains) or Entri Sell (new purchases) behind a single call. Explore those flows and the rest of Entri's products:
Automated DNS configuration for 60+ providers
Let users purchase domains in your app
Automatic SSL certificate provisioning
Custom domain management for your users
## Dive deeper
All showUnify() options
Complete events documentation
Server-side notifications
Understanding DNS records
## Need help?
We're here to help! Email us at [support@entri.com](mailto:support@entri.com) or reach out to your account manager.
 ## 2. Install Entri
Choose your preferred installation method:
## 2. Install Entri
Choose your preferred installation method: